

Payment Link In — Without Detail
Create a Payment Link In where the end-user picks the asset and network themselves at the point of payment.
Use the Without Detail mode when your application does not pre-select what the customer will pay with — for example, when you want to accept multiple cryptocurrencies and let the customer choose, or when you do not know in advance what they prefer. The merchant supplies only the amount, currency, and reference. BEEM holds off provisioning a deposit address until the end-user picks an asset and network on the Hosted Payments Page.
This is the simplest way to integrate Payment Link In, and it is the mode used by the Portal's Request Payment flow.
1. Create the payment
Two ways to create a Without Detail link: via the API or via the Portal. Both produce a link with the same behaviour.
Via the API
The Create Payment endpoint accepts only the top-level fields. No payInDetails object.
Request fields
| Field | Type | Required | Description |
|---|---|---|---|
merchantId | string | Yes | UUID of the wallet that will settle the payment. Identical to the wallet's ID. |
amount | number | Yes | The amount to charge, in the Display Currency. |
currency | string | Yes | The Display Currency code shown to the end-user (e.g. EUR, USD). |
reference | string | Yes | A unique reference for the payment, visible to both you and your customer. |
type | string | Yes | IN for this flow. |
expiryMinutes | integer | No | Link expiry in minutes. Defaults to 1440 (24 hours). |
returnUrl | string | No | Where to send the end-user after they leave the Hosted Payments Page. |
Example request
{
  "merchantId": "00a4af9d-ad4b-42d5-bec4-b7a8c90161fe",
  "amount": 10,
  "currency": "EUR",
  "reference": "ORD-12345",
  "type": "IN",
  "expiryMinutes": 60,
  "returnUrl": "https://merchant.example.com/checkout/complete"
}
Example response
Because no asset has been chosen yet, the response is partially populated. The deposit address, exchange rate, and paid amount are determined once the end-user makes their selection on the Hosted Payments Page.
{
  "uuid": "fef4e99d-b41d-4efe-89fd-4fdf41f3f33f",
  "merchantId": "00a4af9d-ad4b-42d5-bec4-b7a8c90161fe",
  "merchantDisplayName": "Metallica Inc",
  "dateCreated": 1704807605678,
  "expiryDate": 1704808805678,
  "quoteExpiryDate": 1704811205678,
  "reference": "ORD-12345",
  "type": "IN",
  "status": "PENDING",
  "displayCurrency": {
    "currency": "EUR",
    "amount": 10,
    "actual": 0
  },
  "walletCurrency": {
    "currency": "EUR",
    "amount": 10,
    "actual": 0
  },
  "paidCurrency": {
    "currency": null,
    "amount": 0,
    "actual": 0
  },
  "feeCurrency": {
    "currency": "EUR",
    "amount": 0.09,
    "actual": 0
  },
  "displayRate": null,
  "exchangeRate": null,
  "address": null,
  "returnUrl": "https://merchant.example.com/checkout/complete",
  "redirectUrl": "https://pay.hostedpaymentspage.net/payin/fef4e99d-b41d-4efe-89fd-4fdf41f3f33f",
  "transactions": []
}
Two fields to record:
uuid— the payment identifier. Used for any subsequent API queries and matched in every webhook payload for this payment.redirectUrl— the Hosted Payments Page URL to direct the end-user to.
The address, paidCurrency.currency, displayRate, and exchangeRate fields populate once the end-user picks an asset on the Hosted Payments Page. These updates are also pushed to your webhook listener at that point.
Via the Portal
For one-off requests where calling the API is overkill — for example, an ad-hoc invoice from a finance team member — the Portal supports the same Without Detail flow.
- Sign in to the Account Portal.
- Go to Payment Links from the left navigation.
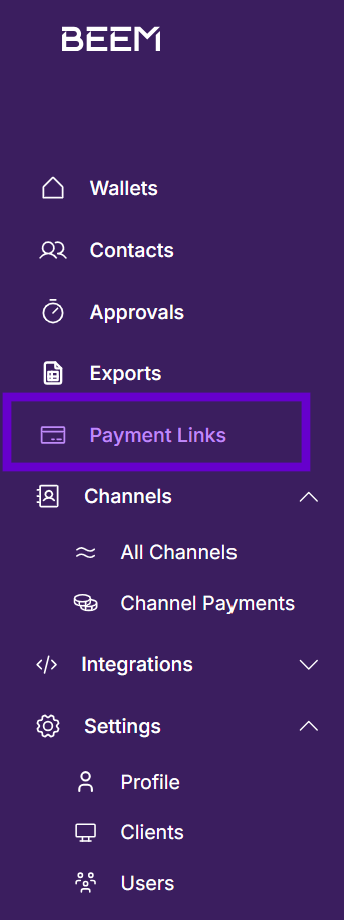
Payment Links sits in the left navigation.
- Click Request Payment in the top right of the Payment Links page.

Click Request Payment to open the dialog.
-
Fill in the Request Payment form:
Field Description Receiving wallet The wallet the payment will settle into. The wallet's currency determines the Wallet Currency on the link. Display currency The currency the customer sees the price quoted in. Most commonly matches the wallet currency. Amount The price to charge, in the Display Currency. Payment reference Your internal label for the payment. Click the sparkle icon to auto-generate one. Expiry time How long the link remains valid. The form defaults to 20 minutes; switch between Minutes and Days as needed. Return URL (optional) Where to send the end-user after they leave the Hosted Payments Page.
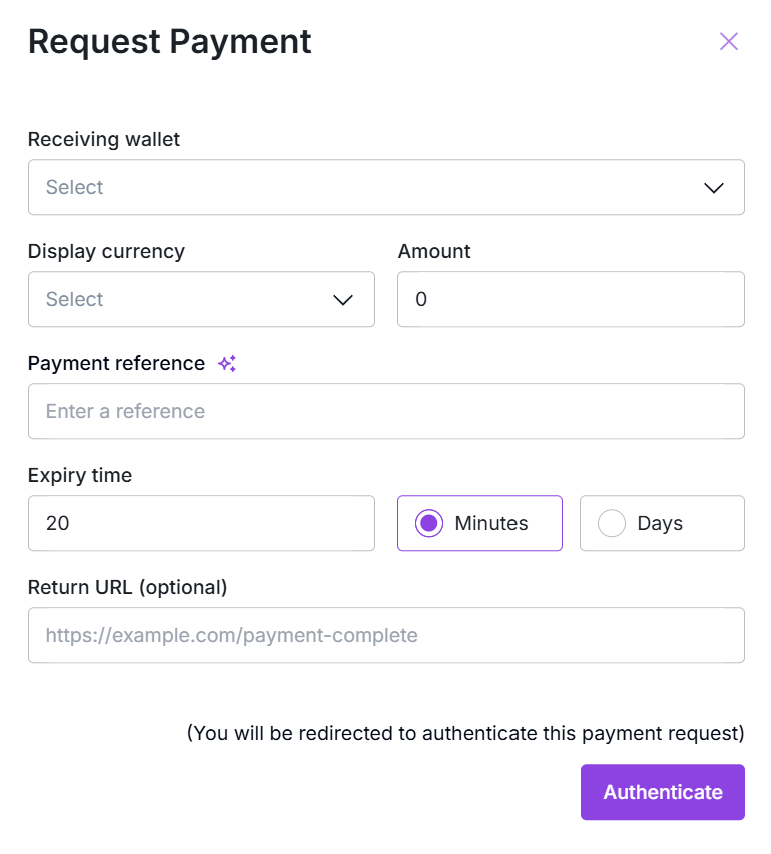
The Request Payment form. Receiving wallet, display currency, amount, reference, expiry, and an optional return URL.
- Click Authenticate.
- Copy the generated link from the confirmation dialog and share it with your customer.
The Portal-generated link behaves identically to an API-created Without Detail link.
2. Direct the end-user to the Hosted Payments Page
Redirect (or iframe) the end-user to the redirectUrl from the response. The HPP renders four screens for a Without Detail link.
Screen 1: Digital asset and network selection. The end-user picks an asset (e.g. USDT, BTC, ETH) and a network (e.g. TRON, ERC20, BASE) to pay with. Until they pick, no deposit address exists. Only assets enabled for your account appear in the list.
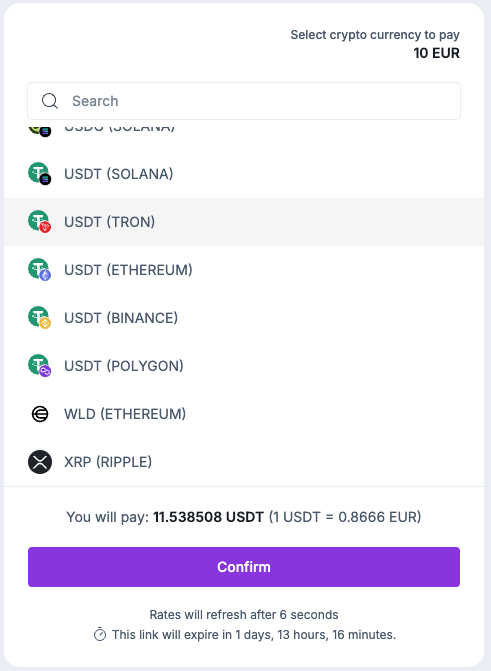
The HPP asset selection screen. The end-user picks an asset and network to pay with.
Screen 2: Deposit address and QR code. Once the end-user has selected an asset and network, BEEM provisions a deposit address. The end-user copies the address or scans the QR with their wallet, then sends the funds.
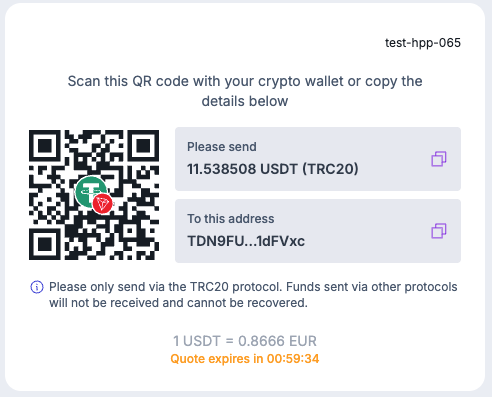
The HPP address and QR screen. End-user copies the address or scans the QR with their wallet.
Screen 3: Pending. Once the transaction is detected on-chain, this screen confirms the payment is in progress. The payment's status moves to PROCESSING and a transaction-detected webhook fires.
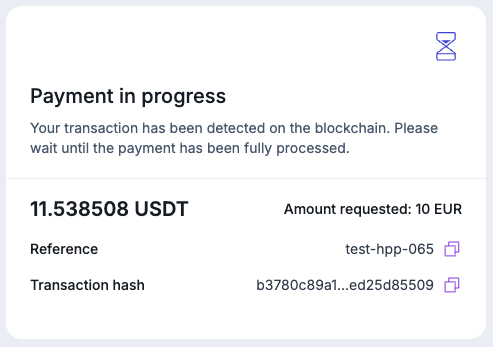
The HPP pending screen. The transaction has been detected on-chain and is awaiting confirmation.
Screen 4: Complete. Once the transaction is fully confirmed, the success state is shown and the wallet is credited. The payment's status moves to COMPLETE and a transaction-confirmed webhook fires.
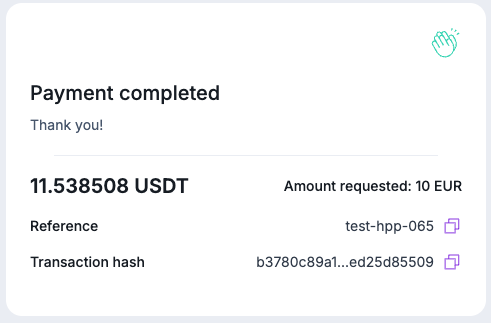
The HPP completion screen. Funds have been received and credited to the merchant wallet.
Only enabled assets appearThe asset/network combinations the end-user can choose from on screen 1 are the ones enabled for your account. If you need additional assets, contact your Solutions Manager.
Building a custom UIIf the HPP does not fit your product, you can build your own end-user UI using the Create Payment response and webhook payloads. The full API specification for this approach is documented separately — contact your Solutions Manager for access.
3. Receive webhooks
Five events fire during the lifecycle:
layer1:payment:checkout:status-change— status transitionslayer1:payment:checkout:transaction-detected— on-chain transaction first seenlayer1:payment:checkout:transaction-confirmed— transaction reaches required confirmationslayer1:payment:checkout:transaction-held— payment held for compliance screeninglayer1:payment:checkout:transaction-late— funds arrived after the link expired
See Payment Link Webhooks for event payloads, the sequence each scenario produces, and recommended handler patterns.
What's next
The mode where the asset and network are fixed at creation time via payInDetails. The end-user skips the asset selection step.
Subscribe to lifecycle events: status changes, on-chain confirmations, holds, and late arrivals.
Handle overpayments, underpayments, and late arrivals.