

Setting up a MetaMask wallet
Install MetaMask, switch to the Sepolia testnet, and prepare to receive test Ethereum and USDT ERC20.
For testing Ethereum (ETH) and USDT ERC20 payments through BEEM's sandbox, MetaMask on the Sepolia testnet is the recommended wallet. This guide walks through installation and switching to the Sepolia testnet.
Steps
- Install MetaMask in your browser — download here. Chrome is recommended. Follow the steps carefully and save your password and recovery codes in a safe place.

MetaMask installation screen
- Pin the extension to your browser by pressing the puzzle icon in the toolbar, then the pin icon next to MetaMask.
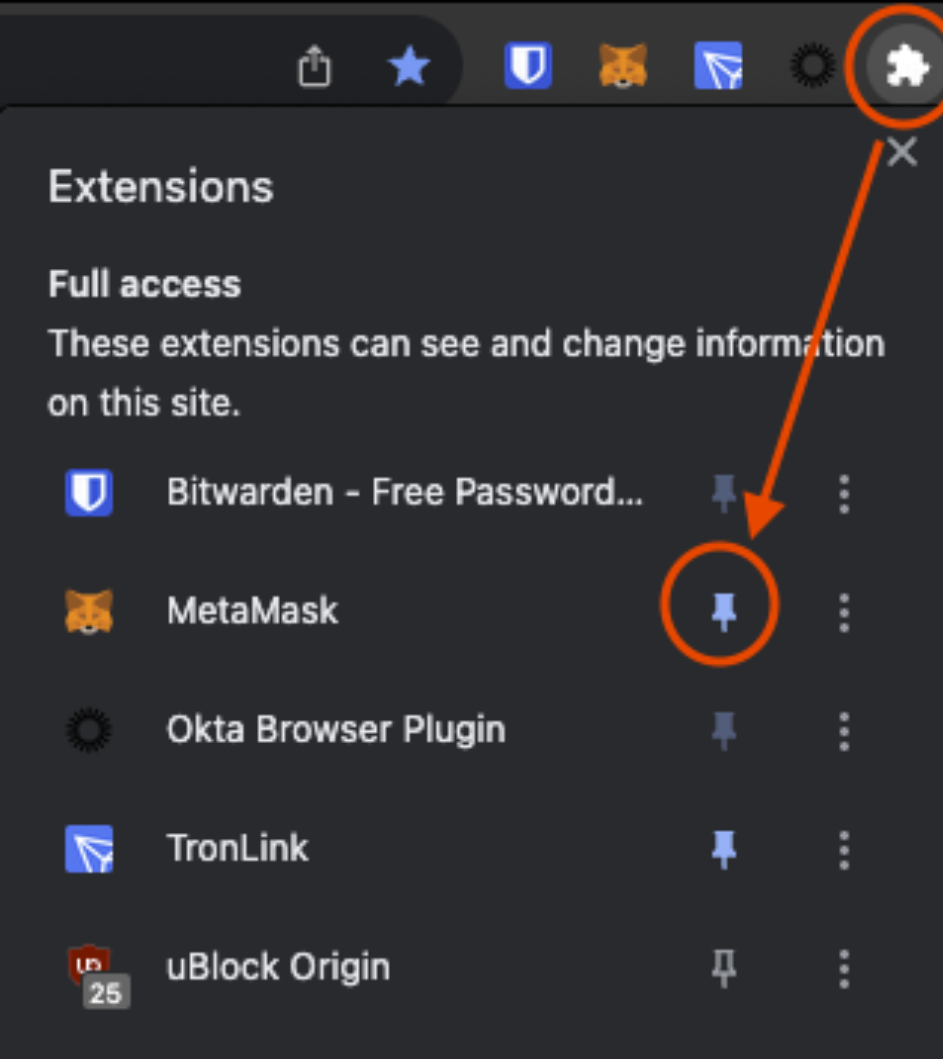
Pinning MetaMask in Chrome
- Open MetaMask by clicking the fox-head icon and log in.

MetaMask login
- Open the network dropdown. Once logged in you are on the Ethereum Mainnet by default. Click the networks dropdown in the top right to change networks.
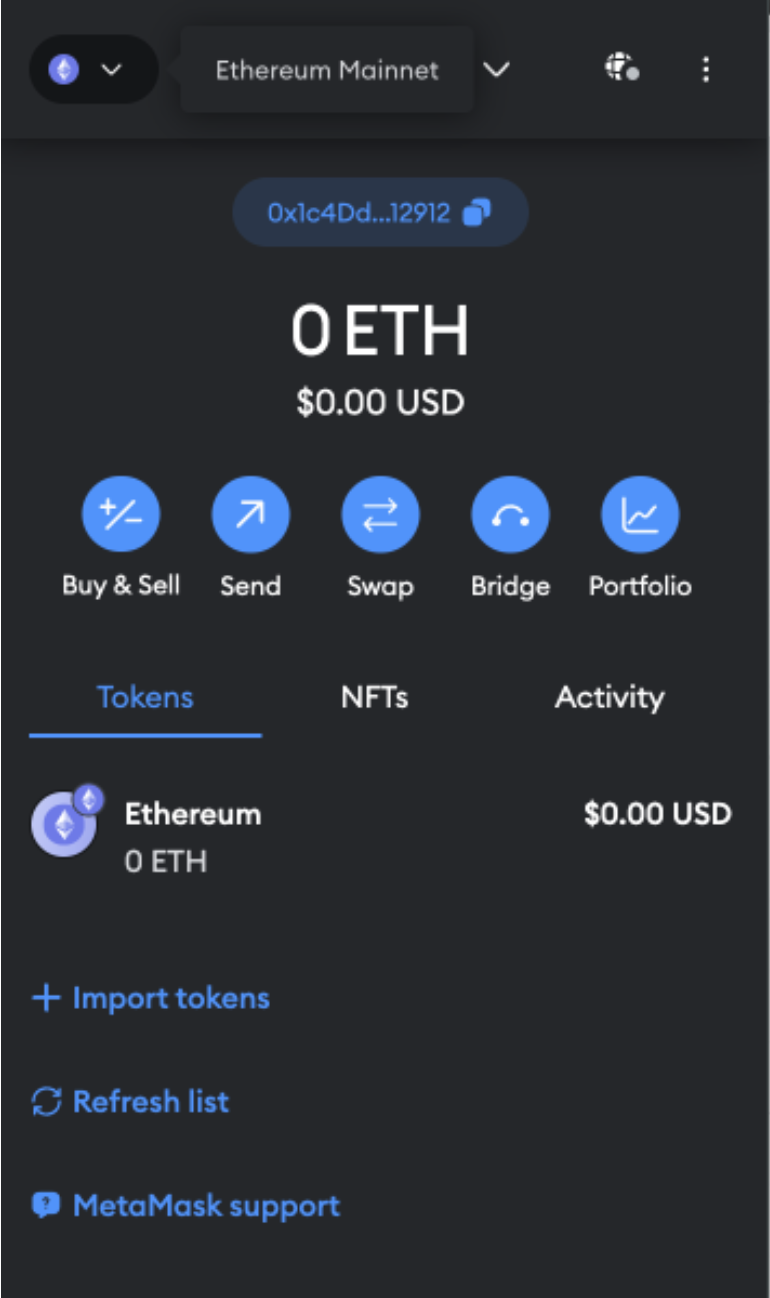
MetaMask network dropdown
- Show test networks by clicking the slider in the 'Select a network' tab, then select the Sepolia network.
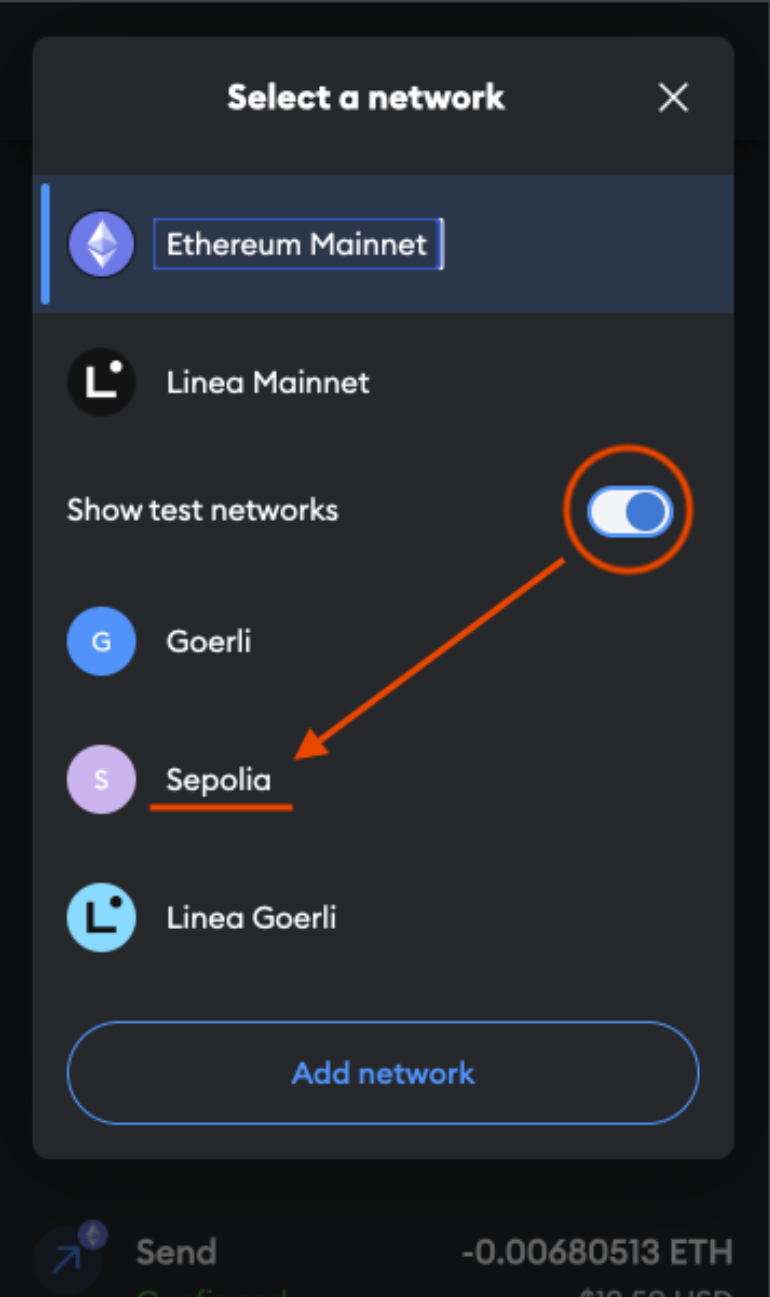
Selecting the Sepolia testnet in MetaMask
- Confirm the switch. Your wallet is now on the Sepolia network — shown by the
Sicon in the top left and theSepoliaETHtoken name. You are ready to receive test ETH and USDT ERC20.
Funding the walletGet SepoliaETH from the Alchemy Sepolia Faucet or the Sepolia PoW Faucet. For test USDT ERC20, follow Adding USDT (ERC20).