
Directing the End-User to Payout
Redirect the end-user to the Hosted Payments Page to complete the payment
Following the successful creation of a payment in the previous step, where you received payment details from the API, this step focuses on utilizing the redirectUrl.
After creating the payment, your next action is to direct your end-user to the Hosted Payments Page for them to complete their payout. This redirection can be achieved either by directly redirecting the user or by embedding the URL within an iframe on your site.
Once redirected, your role is simply to wait.
The Hosted Payments Page, encountered by your end-user, is segmented into four distinct sections:
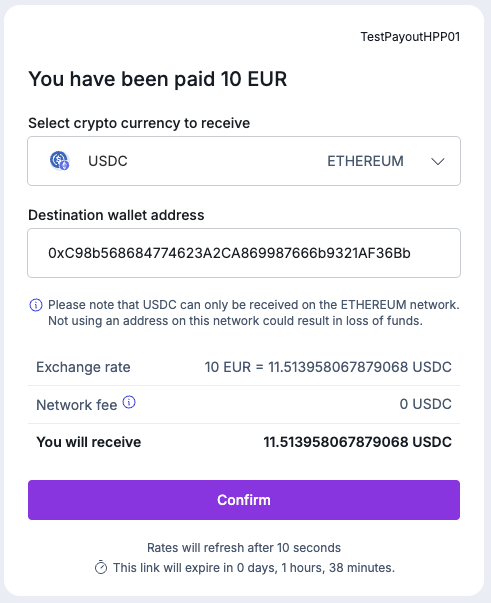
- Digital assets selection, and Input receiving address and validation
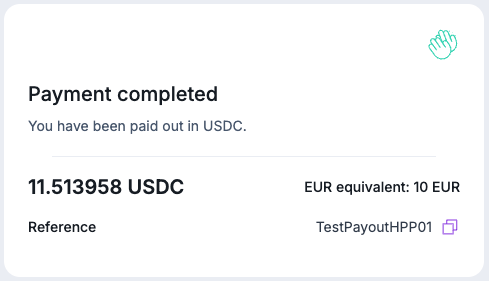
- Payment completion.
Each of these sections is illustrated below:
-
Digital asset and network selection: Here, users are prompted to select a Digital Asset (e.g., BTC, USDT, ETH) and network (e.g. TRON, BASE) to receive, in this case, 10 EUR from the merchant.
-
Payment Completion Screen: When the payment has been fully processed, the user is informed that the payment is complete, with the funds now submitted on the blockchain.
Digital assets supportedOnly the digital assets that are available on the hosted payments page can be used by end-users to complete the payment.
With the payment journey now complete for the end user, Layer1 proceeds to finalize and update the payment status on your portal and dispatches webhook notifications for you to update your system accordingly.
Updated 10 months ago